Saturday 7 August 2010

Back on board!

Well, I've been very quiet for the last couple of months due to my first big house move (my partner and I bought our first place...very exciting!)

However, we are now near enough settled in and my new workplace is all sorted! At least now I have my own desk so won't have to keep moving the ship and risk damaging it!

I don't have many photos to show my recent progress, but just to stay up to date I have done the following since my last post:

I bought a trusty dremel and went to work on the bow and stern parts to shape them for planking. I've got to admit I didn't really use a particularly efficient method for doing this. I simpy worked with a thin plank and laid it on the ribs in various places and then hacked away with the dremel where I felt it was needed. My plan is to make any small adjustments as I lay planks. The area that needed the most work was the around the knightheads. I had to hack away quite a bit of wood to get it in the state in the picture below.


You may also notice in the photo above that 2 of the outer stern collars fell off while I was working! Sods Law of course that only one of them turned up! I think the other one may have gone on an adventure in the bin lorry!

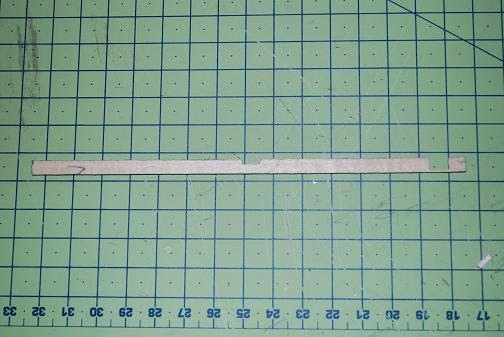
Anyway, this provided the opertunity to do my first bit of "scratch" building, if you want to call it that! I just took a bit of scrap plywood and using my bone saw, dremel, files and sandpaper attempted to make a new one. I was fairly pleased with the result not perfect, but I'm happy for a first attempt!


I mentioned in my previous blog that I was going to add some balsa filler blocks to the bow, but I decided that this wouldn't be needed for the freeboard section, since the planks are very easy to bend and shape! So I will save that for doing the main hull.

So, next step was to start planking the freeboard (not sure if I've mentioned this already, but apparently the "freeboard" simply refers to the area of the hull above the water line.)

I have so far fitted 7 planks to the freeboard, 4 at the stern and 3 at the bow. I'm waiting for the glue to dry on the latest bow plank and will then fit the corresponding plank on the other side and will have finished the basic platform to plank all the freeboard.

I don't have any pictures of this yet, but will give a bried run through of how I am doing it and more detailed stuff later on. To ensure the plank if the correct height all the way along I marked a 25mm line on a piece of paper and then layed this paper on each bulkhead so that the edge was against the deck. I then marked with my knife the 25mm line onto the bulkhead. This marked the place that the bottom of the first plank must lie on each bulkhead. I then carefully glued and nailed the first plank along to the stern. I found it easiest to work from the middle bulkhead, and put on pin in each bulkhead working backwards. I had some trouble with the last bulkhead which I haven;'t yet fixed, but I'm leaving for the moment until I can see how the other planks will lie. One tip I found useful was to use a pair of tweezers to hold the pins in place and then hammer them gently in. I found that the pin pusher was too inaccurate for this job, and the tweezers meant I could be very accurate which my placement of the pin.

I found that the stern planks needed very little bending, however I still soaked these planks for quite a while so they had some suppleness, but found that they would bend freely when fixing them to the ship. However, with the bow planks they required quite a bit of bending. I have heard from various sources that the best way to bend is to use heat. I have found it very effective the bend planks by wetting them first and then holding the main area to bend over the spout of a boiling kettle to really soften them up. I them simply used the outside of the hot kettle to bend the plank round. Very simple but effective. Once I had bent the bow planks in this way I fitted them in the same way as the stern planks.

Another piece of advice that I should pass on is the alternate the side of the ship you are planking. So I did the first bow plank on the starboard side, then immediately did the equivalent plank on the port side. This meant that I could check that they were symmetrical. I actually found the because I wasn't careful in checking when I attached the planks to the first winding frame, while the planks started and finished in the same place, they didn't actually follow the same curve. I was then able to adjust this early and now they look fairly symmetrical! I can now lay planks on top of these and I can just check that they are lining up at the bow and the rest should fall into place. Lots of planks to go but some of the hard work is done.

I'll post again soon with lots more pictures and much fewer words!!

While I here I should add that while I'm still working on issue 4 from Model Space, I've actually received issues 5 and 6. They are very confusing to say the least. I'll report what I received, but won't say anything more about what I think about it!

Issue 5 was simply 80 more basswood planks to continue with the freeboard planking and also to plank the inside of the bulwarks. The instructions for issue 5 also include the construction of the footboard to hold the ship once it has been planked. However, there were no parts with my order so I couldn't actually do this!! However, these parts did turn up in issue 6...and nothing else! The instructions for issue 6 are for planking the hull with sapele planks, but I don't have any!! Having posted on the forum I think this is what I was supposed to get, but it is a bit strange. Having now seen the instructions for issue 7 and 8, they continue to deal with the hull planking, so I imagine that the next couple of installments will just be sapele planks, so it will all work itself out at the pace I'm working, but it was very confusing for a while!

Anyway, enough ramble, more ship building!

Cheers,

Jonny.

Sunday 23 May 2010

No More (tree) Nails

False Gun Deck Complete

So, it's been a while since my last post, but that's because I've been knuckling down and getting all these pesky treenails done!

I haven't been able to get work done on it as much as I would have liked, so it seems like it has taken quite a while to do all the treenails, but in terms of actual modelling time it's been a relatively quick process. Much quicker than I thought it would be!

There were 1280 treenails in the end to do the whole of the false gun deck. The process went pretty smoothly. The only tip I would pass on is that I was having problems with treenails falling out when I tried to sand them down. Some people on model ship world suggested to glue them in place (either by dipping the wire in glue first, or just applying a coat of thinned paint before sanding. However, I ended up getting a better pair of nippers and find that because I could then cut the wire closer to the deck I didn't have any more problems!

Some pictures (Poor ones I know, I've been doing some reading about taking better pictures, so will hopefully start practicing soon!)


My next job was to give the whole a deck a good sanding. I started off with some medium sandpaper around a cork block and tried to get rid of any major unevenness and dirt. I had to abandon the cork block when sanding up close to and in between the bulkheads. I then repeated the whole process with 240 grit sandpaper and finally some 280 grit (for anyone like me who has/had no idea about sandpaper, the larger the number for the "grit" the finer the sandpaper)

I'm pretty happy with how the deck has turned out now that it has been sanded. There are some areas that are a bit lumpy, but that is mainly down to me planking badly. In particular, it is best to make sure that the pins which hold the deck to the keel are tapped completely flush, as I was a bit lazy with this some of the planks bulge slightly which is difficult to fix just by sanding. I'll might have another go with the sandpaper at some point, but seeing as most of it will be covered I'm satisfied.

I haven't taken a decent photo of the deck yet, but here is a quick one I took of the whole thing with the deck sanded:

This officially finishes the third installment of instructions and I have to face the scary reality that I'm going to have to start planking the hull soon! Very scary indeed.

Speaking of which I've been reading an excellent beginners tutorial on hull planking which I would heartily recommend. It can be downloaded from here: http://www.modelshipwrightsdatabase.com/Page/03fp.htm
I will be following this technique as closely as I can, with reference to the AL instructions of course, and also to James Choi's build log to keep me in check.

Part 4!

The next big job will be to prepare the bulkheads for planking. This is described in detail in the tutorial above, and I will post next time to show how I'm doing it, but first a quick note about the instructions. As James Choi points out the instructions say to file and sand the bow section before fitting the bow strengtheners. This makes no sense since you would then have to sand the strengtheners again. So I have fitted them first as in the following photos:


A couple of things to note about this. The instructions aren't 100% clear about where exactly to glue the strengtheners, but they should be glued flush up against each side of the false keel and then against the winding frame.

I have been having a slight issue with the fact that I somehow didn't glue the winding frame quite square with the false keel. When I fitted the false deck this looked really obvious since it wasn't parallel to the winding frame. However, when adding these strengtheners I was able to fix it by first gluing the strengtheners to the keel and then adjusting the winding frame so that it came into contact with them. I then clamped it in this position and when the glue dried the winding frame was magically straight! Good news..I had been worrying about it for quite a while.

The final photo shows a pretty weird clamp position. When clamping the top of the strengtheners the bottoms moved out so I realised I needed to clamp them against the winding frame at the bottom as well as the top. However, since the surface is curved this seemed impossible. I tried a couple of clamps and they just sprung off. I would love to be able to tell you that I came up with an ingenious method to fix this, but what actually happened was show in the photo above. On one side the clamp just stayed in place on about the third attempt! I have no idea how it was gripping so well but I just backed away slowly and prayed that it stayed where it was! The other side actually ended up holding in position because I was holding it for so long while trying to clamp it..so it luckily didn't need a clamp.

Next Steps

The next thing that I will be doing is adding some balsa wood filler blocks in the bow section to make the planking easier. I will then need to do a LOT of filing and sanding of the bulkheads at the bow and stern so that I can start planking. This will involve quite a bit of patience and work but I will post a detailed description of what I am doing as I do it!

Fun times lie ahead!

Jonny.

Friday 14 May 2010

Do trees have fingers?

...they must do, where else would you find the treenails?

*Groan*

OK, that was poor, but it's Friday and I'm tired. High time for a blog post I thought to myself, so here it is.

As I mentioned in my last post, I have experimented with a technique of "treenailing" the deck. On real ship, the planks would have been fixed down to the deck beams by using wooden nails, the aforementioned treenails. There are various methods used by modelers to simulate these treenails. The way that the AL instructions suggest is simply to use a pencil point to mark them in. I thought that this would look a bit rubbish to be honest (not least because I would get bored of sharpening my pencil, and the treenails would be different sizes!)

The method that I decided to use was 100% stolen from a member of the model ship world forum. His excellent build log of the HMS Supply is well worth a read. It's very long but worth it! It can be found here: http://modelshipworld.com/phpBB2/viewtopic.php?t=6295

Anyone, this is how I do it:

First, I mark two lines alongside the butts of the planks. This showed up the fact that I hadn't been anywhere near perfect with lining up the planks, despite my best efforts! Still, it wasn't too bad a job, so the treenails will be nicely lined up, and the correct side of the butts (only just in some cases!)

Then I take my little pointy thing (I think it's called an awl) to mark the places that the treenails will go. I think this pattern is fairly standard, but I may well be wrong. The main thing for me is that it looks OK!


I then have to drill the holes with a drill bit that is 0.5mm in diameter! This is a seriously small drill bit. I bought a few of them as break very easily and bought what they call a "pin vice" to hold the bit. Not much force is needed to drill the hole, just rotation I have found.


The treenail is then made using 0.5m copper wire. This will be available from most hobby shops I imagine, as apparently it is used a lot of model railway enthusiasts. I push the end of the wire into the drilled hole, and then snip off the end. To make things easier it is best to snip the wire as close to the deck as possible. I have found that if they stick out too much some of them tend to fall out when sanding. I think this problem is mainly due to the quality of my snippers. I have had some success, however, with using the tips of the snippers to push the treenail further into the hole to make it flush with the deck. This is a bit time consuming so I may invest in some better quality snippers!


The final step is to take some medium-fine sandpaper and sand down all the treenails. I tend to do a whole row at once to save time. Sanding them not only flattens them against the deck, but also shapes them nicely! This picture shows some completed treenails:


The whole process is quicker than it sounds, but it is still quite laborious and is going to take a long time to finish. I wouldn't recommend it to anyone who doesn't like repetitive tasks. So far I've done 449 treenails, and probably have another 1000 or so to do! I'll most likely do some fairing of the hull (more on that later) to break it up a bit in preparation for planking the hull!

To finish, here are a couple of pictures of the model in it's current form. It's really hard to photograph the treenails, so they're barely visible in these photos, but they're there (all 449 of them) I promise!


Onwards and upwards!

Jonny.

Sunday 2 May 2010

You can't get the wood you know...

Well, judgement day has arrived, and the planking gods decided they were going to monkey with my emotions, and leave me agonisingly short of wood to finish the deck planking!

I'd feared it would happen for a while, but because I went against the instructions and did individual planks, I ran out of wood before I had finished the planking! I have a large pile of offcuts that would do the job, but hey are all too short and I want it to be perfect so am considering my options about getting some more wood to finish the job!

Just to show how close I came, here is the area that is left to be planked:


Other than that, deck planking has gone pretty well since my disaster with the wonky planks. The port side of the ship is completely planked and trimmed flush. I have a few small planks to trim flush on the starboard side but apart from that, I just need to wait until I get more wood to finish the deck and then I can give the whole thing a good sanding.

One trick I discovered half way through doing the job was to flip the ship upside down when trimming the planks at the edge of the deck. This means that you can easily see how much of the plank needs to be trimmed and whittling the plank away with my craft knife was a lot easier. However, one word of caution, don't make the silly mistake that I did of trying to file/sand the plank flush while the ship is upside down. I temporarily forgot about gravity and when I started to file the first plank this way, it promptly fell off! Much better done with the ship the right way up me thinks!

Some quick pictures of the ship in it's current state:


And now I think it's about time for a terminology diversion.

A terminology diversion

For no other reasons than the fact my girlfriend and I were curious, and because I've used the terminology above I thought a quick definition and explanation of the words Starboard and Port were in order. Before ships had rudders they were steered by a special type of oar located at the back (stern) of the ship. Since most people are/were right handed, this oar was located on the right hand side of the ship (for someone looking towards the front/bow). Starboard comes from the old English word steorboard, which means literally the side of the ship which is steered. Since this steering oar was located on the right side, early ships would also dock into the port on the left side, to avoid crushing the steering oar. Hence, the left hand side of the ship is referred to as port. Incidentally, anyone who has read James Choi's wonderful build log of the surprise will notice he refers to the port as the "larboard" side. This is just another word for port which again came from an old English word meaning the "loading" side of the ship. It was changed to port because it sounded too much like starboard!

Well, enough of the lexicon lesson. It was largely stolen from wikipedia anyway, since that was where I looked it up. It could therefore be very wrong, so I welcome corrections!

Back to the build...

Cutting mast holes

Right, the only other thing that I have done on the model is to cut out the mast holes. Since the AL instructions just say "draw in the mast holes before covering them planks" and "cut out the mast holes" with no indication as to how this might be done, I once again to did what I could with what I had! So another "How I did it" guide to cutting mast holes out.

Firstly, while I was planking I marked the holes as I covered them. The best way I found to this was to mark two points of the circle at opposite edges onto the first plank I laid. Once the hole was planked over I then measured the distance between these two points to get the diameter of the hole, and then simply used a pair of compasses to draw of circle with this diameter. I end up with the hole marked like so:

To cut out the hole I started by using a hand drill to make a small hole in the centre:

I then used a small needle file to open this hole up a bit:


Now comes the messy, and probably inefficient bit where I attack the hole with my trusty craft knife! This step was simply to open up the hole enough to get the larger round file in. I imagine this could be better achieved by continuing to open the hole with the needle file, but I found my method quicker, and the mess will get tidied up in a minute!


Next I get a round file, and slowly open up the hole, filing the edges until it it completely open and finished! I usually gave them a quick once over some sandpaper to get rid of any scruffy edges, but there you have a vaguely neat looking mast hole.


One thing to note is that since the middle plank is being split into two, I found with all the holes that both sides of this plank invariably came unglued when cutting and filing (as below). This wasn't a problem however, as I was careful not to damage them, and could then simply glue then back down when I had finished.


Anyway, I think there is quite enough in this post already so I will leave with an "action shot" that my wonderful partner (Marie, who is incidentally a far superior photographer than me, and is responsible for all the "in progress" photos in this blog) took while I was struggling away with the needle file. I particularly like the obvious tension in my left hand...a common symptom of my sheer terror when taking any sharp edge anywhere near my model!

Happy building everyone!

Jonny.

Thursday 29 April 2010

Good evening one and all!

As I'm still plugging away with deck planking I thought I would post a bit of a guide to how I am doing the detailed planking around the bulkheads at the edges of the deck. I almost called it a "how to" but I think I prefer "how I did it" as there is nothing in the instructions about how to achieve this (it just says something like "cover the deck with planks") so I just did what I could with the tools I had!

So, as I get to the edges of the deck, full planks won't fit since the bulkheads start to get in the way. So, my first step is to cut a full plank and then mark the area where the bulkhead is going to overlap. I do this by first laying the plank in it's correct vertical alignment and mark where the bulkhead is, like so:


This photo is actually a bit misleading, as I wasn't really thinking straight, but this step is much easier/more accurate if you lay a ruler against the bulkhead to mark the line.

I then lay the plank in the correct horizontal position to mark how far the bulkheads cuts into the plank like so:

This then enables me to to "draw" the bulkhead position onto the plank. As a general rule I found I didn't have to be 100% accurate here as long as I always underestimated the measurements. This meant that I could sand/file to the precise dimensions. Cutting too much out would be impossible to fix! So a plank is marked like so:

Notice that this plank goes around 2 bulkheads. The same technique was used to mark both areas to be cut. Speaking of which, on to the cutting! Simple enough I would say, I just used a basic craft knife to do the job. Although note in the first picture the direction I am cutting. This is a tip I picked up from a book after making the mistake myself. Always cut in towards the centre of the plank, rather than out from the centre, as otherwise the friction of the knife can splinter the wood.


The grooves cut rarely fit exactly so I used a small file to slowly open up the groove until it slotted into place.


And finally we have a finished plank:

You might notice that the finished plank above isn't actually the same one that I took the other photos of. This is just because I wanted to show an example of a plank that needed some fairly extreme trimming (translation - I wanted to show off!.) The groove to the right is less then a mm from being a full plank width. That one needed some steady nerves!

So, once a plank is trimmed like this it can be slotted in and glued in the normal way. The picture belows shows how this worked in a area of planking around a bulkhead.


On top of these types of planks, there are also some very small areas left unplanked where the deck tapers towards the bow and stern. In most cases I planked these by cutting a very rough piece, glueing it the deck/neighbouring plank and then filing/sanding it to shape in position...as in this example:


One small confession to make. In my excitement of taking photographs I actually completely messed up the plank I was doing above (hence no picture of it in place!) Firstly, I wasn't careful when marking the bulkhead positions, and ended up with it not butting correctly to the next plank, leaving a nasty gap at it's end. I then made another plank, and while I was filing it I caught the top with my hand and snapped it! I ended up actually gluing the two halves on separately and it's hardly noticeable. Whoops!

Anyway, I think that's enough for one day, so I'll leave you with a terrible photo of my current position (167 planks at last count.)

Happy building everyone!

Jonny.

Wednesday 28 April 2010

First big boo boo

Walking the (wonky) plank!

Well, I've now got 138 individual planks done, but not without a few choice profanities.

Before I go any further, some advice for anyone deciding to do the planking individually like I've done. Don't try and save time by doing chunks of planks in the same area at once. It is much more difficult to ensure that a plank is lying straight when there is nothing to butt the plank against lengthwise. If you look at the following picture:

Everything looks fine, but I didn't check well enough whether the top 8 planks were actually straight or not. I thought they would have enough contact with other planks to stop them 'turning' but as I progressed with the planking this wasn't the case. Some of the centre planks started to turn which resulted in gaps appearing between the planks on one side as in the following picture:
On the other side the planks started to not 'fit' and so needed some tapering, which started to look pretty ugly. Fortunetly I noticed the problem early-ish which meant that I could rectify it to some extent, but now every time I look at the deck all I can see are those mistakes!

I think I'm being a bit harsh on myself, as the picture above shows the worst section and peope keep telling me that is not as bad as I say it is, but I am bit annoyed as I know it would have been simple enough to avoid if I hadn't tried to rush and get lots of planks done at once.

For the record, the way to avoid this would have been for me to lay full runs of planks at a time, like the first run I did. This would mean every plank could be glued flush against it's neighbour and no gaps would appear.

THe main thing to remember is that the majority of this deck will be covered over, and the worst offending areas on mine will be covered.

Anyway, enough feeling sorry for myself, and more pictures of the ship with 138 planks (25 full runs) in place.


Apologies for the quality of the photos, I know it's difficult to see the planking. I have a pretty snazzy camera that I don't really know how to use properly and that has a basic lens so can't capture much!

Fiddly Planks

I've now moved on to cutting and fitting planks right up to the edge of the deck. Obviously this means doing some precision cutting to accomadate the bulkheads. I'll post again soon to show my progress and the simple methods I've used to achieve it.

For those out there who, like me, can't do anything without quantifying it, I have now cut and fitted 150 individual planking pieces. This does include some very small filler bits that I had to fix on with tweezers!

Thanks for reading!

Jonny.

p.s. I took a trip to our local second hand book shop at the weekend and found Patrick O'Brian's Master and Commander. This is the first in a long series of books (one of which is called HMS Surprise) which feature this lovely ship that I'm trying to build so it seemed fitting that I should start to read them as I'm building.

Sunday 25 April 2010

Weclome to the Plank Factory

Nothing much to report today, but needed a break from deck planking so thought I would give a quick tour of the plank factory.

Without further ado, here it is:


Some imortant features to note:

  • The odd black shape in the middle is my new toy...an Amati Master Cutter. It's not the most amazing piece of kit out there but it doing a job for me at the moment. Basically it makes accurate right angle cuts for the ends of my planks which has made things a bit quicker/more accurate.
  • The three piles of timbers at the top are the three stages in the assembly line. From right to left, 1 - timbers roughly measured and cut; 2 - Timbers after they have been carefully sanded to the exact length against the test plank; 3 - caulked and completed planks.
  • The much needed "chips and dips" that keep me fueled and ready to go for more planking!
  • Things have been coming along very well today and plank production has increased dramatically. I've made and fitted another 8 (bringing the total on the ship to 62) and I have another 24 ready to go. There is also another 16 in the assembly line.
By my calculations if I do another 32 planks today then I'll have enough to finish the main chunk of the deck and then I can move onto the trickier edges.

Well, best get back to it!

Jonny.